
Producers, beatmakers, and composers frequently search for how to convert audio to midi when they want to layer a recorded piano progression with virtual synths, turn a hummed smartphone voice memo into a lead hook, or re-voice an acoustic guitar sample inside Ableton Live, Logic Pro, or FL Studio. While most modern DAWs include basic built-in pitch conversion commands, pre-cleaning and quantizing your recording in an interactive browser workbench before importing saves hours of manual piano-roll editing.
Why Pre-Clean Before Importing Into Ableton, Logic, or FL Studio?
If you have ever tested how to convert audio to midi using stock DAW commands—such as Ableton Live's Convert Harmony to New MIDI Track, Logic Pro's Flex Pitch to MIDI, or FL Studio's Edison Dump to Piano Roll—you have likely encountered three workflow bottlenecks:
- No Live Overtone Duration Gate Before Conversion: Stock DAW converters dump every detected spectral partial straight onto a single MIDI clip. You are left zooming into the piano roll to delete hundreds of 20ms harmonic ghost notes by hand.
- Merged Single-Channel Chord Voicings: Built-in harmony converters place bass roots and upper treble chords onto a single Format 0 channel, making it tedious to route the left-hand bassline to a sub-bass synth and the right-hand chords to an electric piano patch.
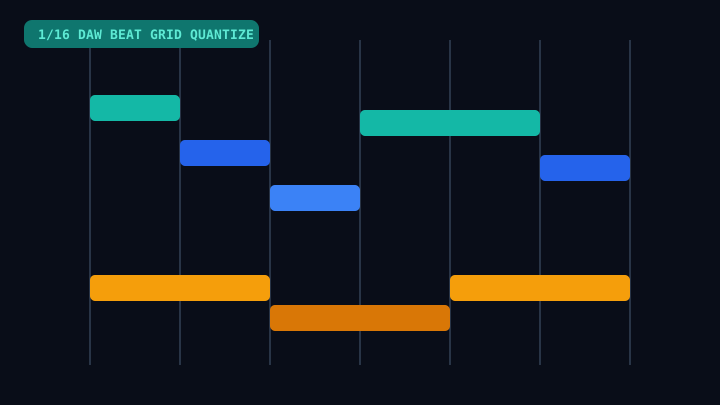
- Tempo Map & Grid Drift: Dropping an unquantized audio take into a 120 BPM project without aligning note onsets to a 1/16 or 1/8T grid causes notes to straddle barlines and trigger uneven arpeggiator timing.
Step-by-Step: How to Convert Audio to MIDI Online in Your Browser
Our online Audio to MIDI Converter solves all three problems before you even open your DAW. Because audio spectrum decoding runs locally inside your browser via Web Audio API, your raw MP3, WAV, FLAC, or M4A stems stay private on your machine while you audition and tune the transcription live.
1. Choose the Right Workbench Preset for Your Audio Stem
Getting clean DAW-ready MIDI starts with matching the detector settings to your instrument source:
- Full Range Chords, Guitars & Synths: Start on the main Audio to MIDI Converter, which balances polyphonic chord detection across all 88 keys with a 65ms default Ghost Note Filter.
- Two-Hand Acoustic or Digital Piano Stems: Use the dedicated Piano Audio to MIDI Converter. It is tuned specifically to suppress damper-pedal sympathetic resonance and split Right Hand Treble (
C4and above) and Left Hand Bass (belowC4) onto two separate tracks. - Singing, Acapella Hooks & Smartphone Voice Memos: Open the Vocal Audio to MIDI Converter. It applies a 60ms to 85ms breath-and-sibilance gate so consonant clicks and intake breaths do not turn into stray high notes, and lets you transpose your sung melody by
-12to+12semitones in real time.
2. Dial In the 0-130ms Ghost Note Filter and 1/16 Beat Grid
Once your file decodes onto the 88-key Piano Roll, press Play 15s Piano Audition to hear the detected notes through our built-in Web Audio grand piano synthesizer. Click DSP Controls in the toolbar to fine-tune four studio parameters while preparing your sequence:
- Ghost Note Filter (0ms to 130ms): Slide rightward to strip short harmonic overtones and room echoes before generating your file.
- Beat Quantization (
Off,1/4,1/8,1/16,1/8T): For tight electronic or pop production, select1/16for straight grooves or1/8Tfor swing and triplet beats. - Hand Split (
Both,Right,Left): Solo either the upper treble register or lower bass register to verify voice leading before exporting. - Tempo BPM & Semitone Transpose: Match the playback BPM to your target DAW project tempo (
50to200BPM) or shift the key up or down by up to 12 semitones.
3. Export SMF Format 1 (.MID) and Drag Into Your DAW
Every visitor can download a 15-second .MID sample for 0 credits to test how the file behaves inside their DAW right away. When you are ready to export the complete multi-track file (1 studio credit), the workbench generates a binary Standard MIDI File Format 1 (.mid).
DAW Import Cheat Sheet for Ableton Live, Logic Pro & FL Studio
| DAW Environment | Import Action | Dual-Track C4 Handling | Tempo BPM Sync |
|---|---|---|---|
| Ableton Live 11 / 12 | Drag .MID into Arrangement or Session View |
Creates Track 1 (RH Treble) + Track 2 (LH Bass) | Prompts to import embedded MIDI tempo |
| Apple Logic Pro | Drag .MID onto Tracks workspace |
Splits onto two Software Instrument lanes | Hold Option on drop to import tempo map |
| Image-Line FL Studio | Drop .MID onto Channel Rack |
Select One channel per track in dialog | Enables project BPM alignment automatically |
| Steinberg Cubase / Nuendo | File -> Import -> MIDI File | Places Format 1 tracks on separate lanes | Reads SMF Format 1 tempo meta-event |
How to Import Your Converted .MID File Into Major DAWs
Once your dual-track .MID file is exported from the browser workbench, completing the import step inside your studio session takes seconds:
- Ableton Live: Drag the
.MIDfile from your downloads folder into Session or Arrangement View. Ableton automatically creates two separate MIDI tracks—Track 1 for Right Hand Treble and Track 2 for Left Hand Bass—while asking if you want to import the embedded BPM tempo map. - Logic Pro: Drop the
.MIDfile onto the Tracks area. Logic places the treble and bass channels onto distinct software instrument lanes with all 1-127 note velocity dynamics preserved. - FL Studio: Drag the
.MIDfile onto the Channel Rack or Piano Roll. In the MIDI Import dialog, select Create one channel per track so your bassline and upper chords load into independent instrument channels.
Try the Complete Workflow Free in Your Browser
Now that you know how to convert audio to midi with zero ghost-note clutter and automatic dual-track separation, upload your first MP3, WAV, or M4A recording in the Audio to MIDI Converter and download a free 15-second .MID sample to test inside your DAW today.